Creating Custom Avatars
In Onland you have the freedom to choose from a selection of featured or newly introduced avatars, or you can unleash your creativity and design your own.
Depending on how involved you'd like to get in the avatar creation process, you might choose one of the avatar bodies from our database, create your own personal avatar, or upload your own 3D model.
![]()
Cartoon Avatars
You can create your own Cartoon Avatar following these steps:
Upload your own model
You can also upload your own 3D model following these steps:
- Enter a Onland room
- Select the user dropdown icon in the top left corner of the screen
- Select 'Avatar Settings'
- Click the Change Avatar’ button
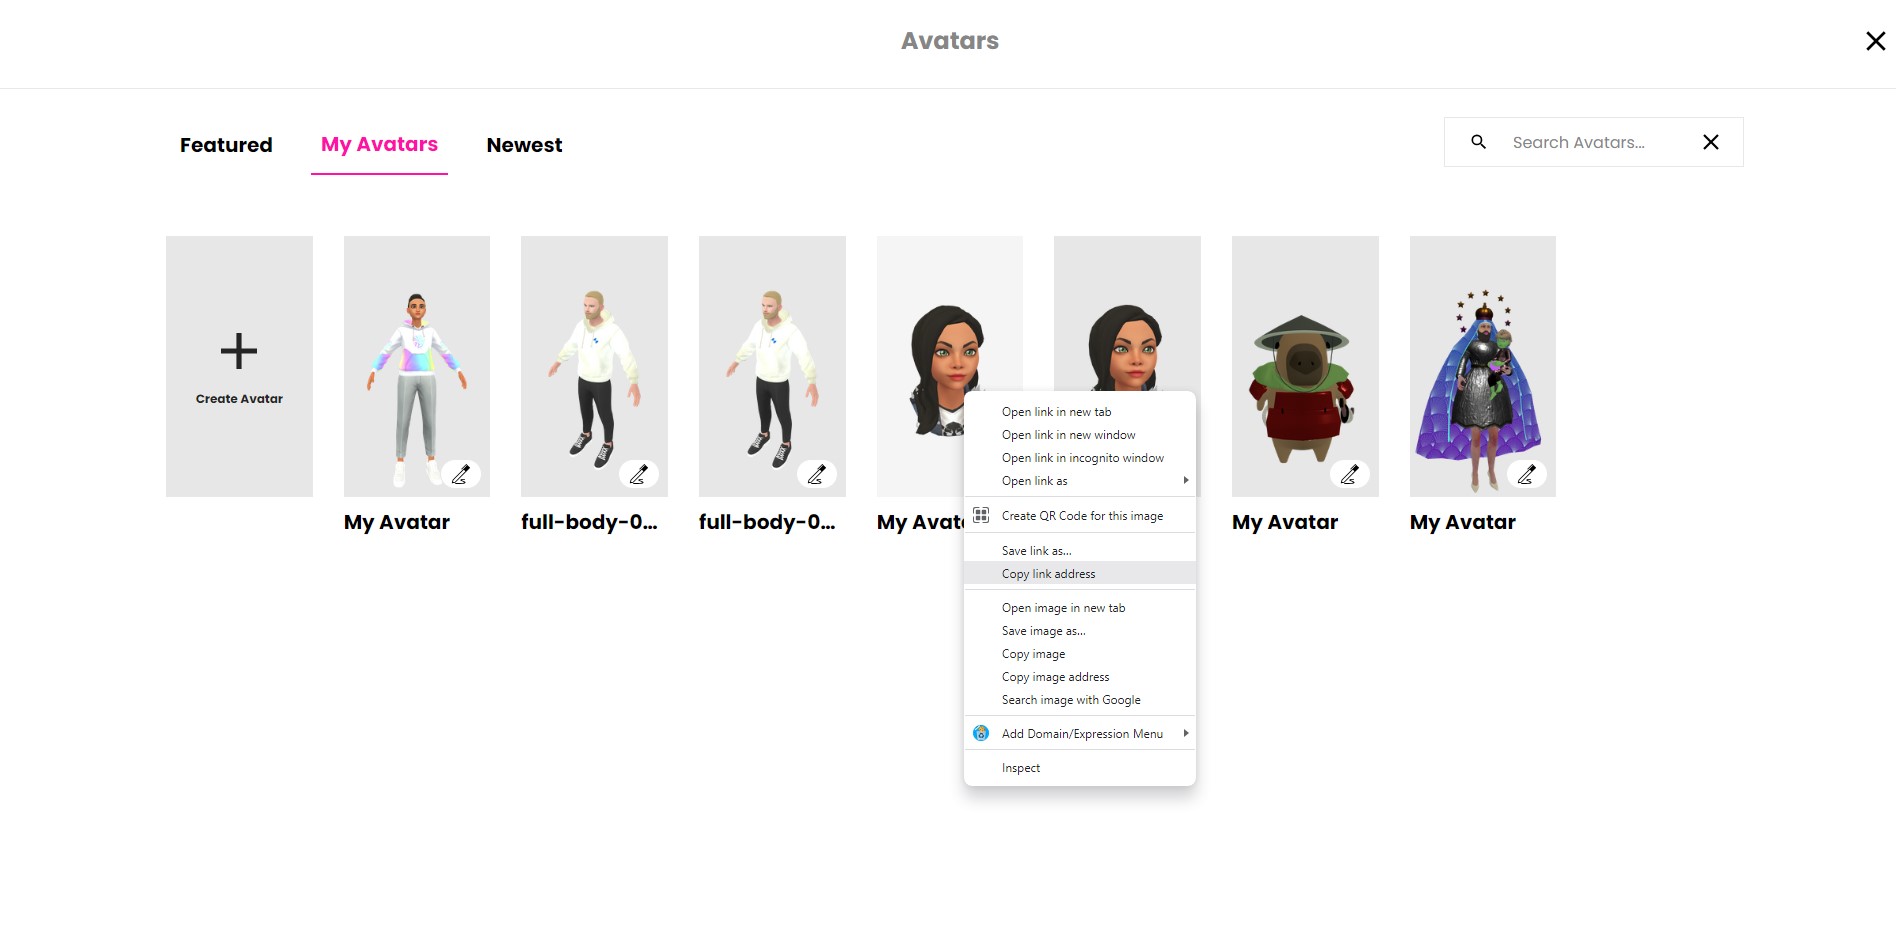
- From here, you can see a list of the featured avatars, the first spot should say "Create Avatar"
- In the avatar customization screen click the 'Custom GLB' button to upload your 3d model
- Save the avatar
Sharing avatar links privately
Suppose you find yourself in a scenario where specific avatars should be accessible to certain individuals while remaining exclusive to others. For instance, during an event, the performer might have a unique avatar, or moderators could wear custom-designed shirts not available to attendees. In such cases, Onland provides solutions for private avatar sharing.
To accomplish this, you can create a custom avatar, either one created by you or a 3D GLB model file, and then share it with the event organizers for upload.
- Create a room where you are going to share your avatar.
- Upload the special avatar you wish to share and locate it in your list of "my avatars."
- Right-click on the avatar and select "copy link location."

- Pin this object so that it doesn't disappear when you leave the room. (Hover cursor on it, press the space bar, and select "pin".)
- Share the URL to this room with the organizing team. To wear an avatar, users just have to point at the one they want and select "Use avatar".